How to create and manage WordPress pages
A step-by-step guide to adding, organising and publishing pages in WordPress. Understanding pages and posts WordPress provides two main ways to publish content: pages and posts. Posts are generally used for blog articles, news and other time-sensitive content. They are usually displayed in date order and can be organised using categories and tags. Pages are […]
A step-by-step guide to adding, organising and publishing pages in WordPress.
Understanding pages and posts
WordPress provides two main ways to publish content: pages and posts.
Posts are generally used for blog articles, news and other time-sensitive content. They are usually displayed in date order and can be organised using categories and tags.
Pages are intended for more permanent website content, such as:
- About
- Services
- Contact
- Privacy Policy
Pages are usually included in your website navigation and do not normally use categories or tags.
Create a new page
To add a new page:
- Log in to your WordPress dashboard.
- Go to Pages → Add New.
- Enter a title for the page.
- Begin adding your content in the WordPress editor.
Depending on your website setup, you may see the standard WordPress Block Editor or a custom page-building system.
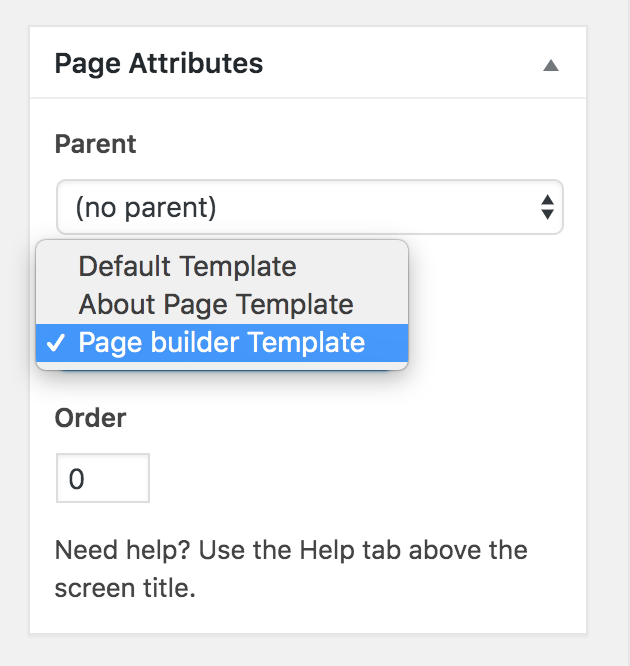
Choose a page template
Some WordPress themes include different templates for specific types of page.
Common examples include:
- Full-width page
- Landing page
- Contact page
- Sidebar page
You can usually find the template option in the page settings on the right-hand side of the editor.
Choose the template that best suits the content you are creating. Some templates may also display additional fields or layout options.
Add content to the page
The WordPress Block Editor allows you to build pages using different content blocks.
Click the + icon to add a block. Common blocks include:
- Paragraphs
- Headings
- Images
- Videos
- Buttons
- Columns
- Lists
You can also begin typing directly into the editor to create a paragraph block.
Format your content
Use the editor toolbar to format text and improve the structure of the page.
You can:
- make text bold or italic
- add links
- create bullet or numbered lists
- align text and images
- add buttons
- arrange content into columns
Use headings to divide longer pages into clear sections.
The page title normally acts as the main heading, so headings within the content should usually begin with Heading 2. Smaller sections beneath those can use Heading 3.
Add images
Use an Image block to upload a new image or select one from the Media Library.
When adding an image:
- Choose or upload the image.
- Add suitable alternative text where appropriate.
- Select the required image size.
- Adjust the alignment or width if needed.
Avoid uploading unnecessarily large image files, as these can slow down the website.
Preview the page
Before publishing, use the Preview option at the top of the editor.
You may be able to preview the page on:
- Desktop
- Tablet
- Mobile
Check that the content is easy to read, images display correctly and buttons or links go to the right place.
Publish a new page
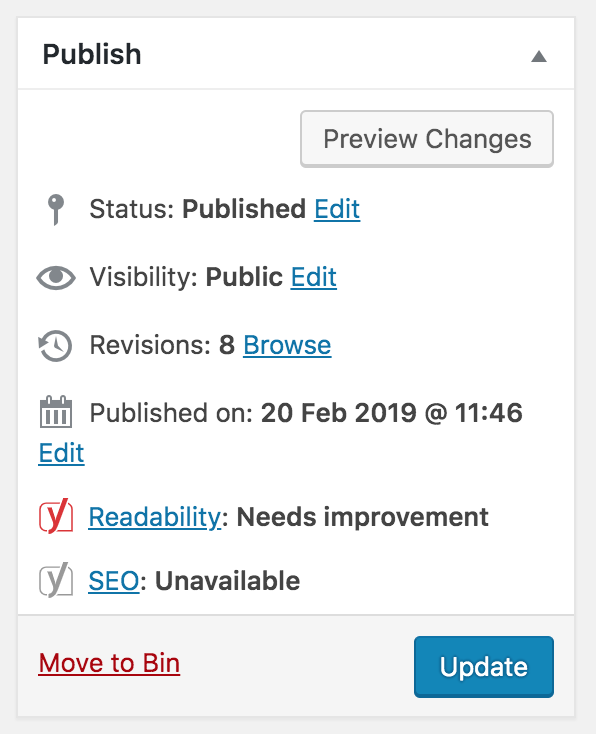
When the page is ready, click Publish.
WordPress may ask you to confirm the visibility and publication settings before the page goes live.
For an existing page, the button will usually say Update instead.
Choose the page visibility
The page settings allow you to control who can view the page.
Available options may include:
- Public — visible to everyone
- Private — visible only to authorised users
- Password protected — available to anyone with the password
Most standard website pages should remain public.
Schedule a page
You can publish a page at a future date instead of making it live immediately.
Open the publication date setting, choose the required date and time, then confirm the schedule.
The page will publish automatically at the selected time.
Organise pages using parent and child pages
WordPress allows you to create a hierarchy by assigning one page as the parent of another.
For example:
Services
└── Web Design
This can create a URL such as:
yourwebsite.com/services/web-designTo assign a parent page:
- Open the page editor.
- Find the page settings in the right-hand sidebar.
- Open the parent or page attributes setting.
- Select the required parent page.
- Publish or update the page.
A parent and child relationship does not always add the page to your website menu automatically. You may still need to update the navigation separately.
Change the page URL
The final part of a page URL is called the slug.
For example:
yourwebsite.com/aboutIn this example, about is the slug.
To change it:
- Open the page settings or click the URL beneath the page title.
- Enter the new slug.
- Use lowercase letters and hyphens rather than spaces.
- Click Update or Publish.
Keep URLs short, clear and relevant to the page content.
Take care when changing the URL of an existing published page, as old links may stop working. A redirect may be needed to send visitors from the previous address to the new one.
Save a page without publishing it
WordPress saves work automatically while you edit, but you can also save an unfinished page as a draft.
A draft is not publicly visible and can be returned to later.
This is useful when the content still needs approval, proofreading or additional images.
Duplicate an existing page
Some websites include a duplicate or clone option added by a plugin or custom theme.
Duplicating a page can be useful when creating several pages with a similar structure. After duplicating it, make sure you update:
- the page title
- the URL
- the content
- any images
- metadata and SEO settings
Do not publish a duplicated page until all copied content has been replaced.
Add the page to your navigation
Publishing a page does not always add it to the website menu automatically.
To include it in the navigation, go to:
Appearance → Menus
Add the page to the correct menu, position it where needed and save your changes.
Some newer WordPress themes manage navigation through:
Appearance → Editor
Edit an existing page
To update a page:
- Go to Pages → All Pages.
- Find the page you want to change.
- Click its title or select Edit.
- Make your changes.
- Click Update.
Check the live page after updating it to make sure the content and layout display correctly.
Delete or restore a page
To remove a page, go to Pages → All Pages and select Move to bin.
The page will move to the WordPress bin rather than being deleted immediately.
You can restore it from the trash or delete it permanently. Be careful when removing published pages, particularly when they already receive traffic or are linked from other parts of the website.
Final checks
Before publishing or updating a page, check:
- the title is clear
- the URL is appropriate
- headings are used in the correct order
- links and buttons work
- images have suitable alternative text
- the page displays well on mobile
- the correct template is selected
- the page has been added to the right menu where needed
Your website may include custom templates, fields or content blocks, so some options may look slightly different from the standard WordPress editor.